Navigation
Argos has been designed with an intelligent interface that knows your user type and configures menus and buttons to show only those actions permitted.
Menus across the top allow you to take simple actions such as logging in to the product, finding items in the Explorer, customizing your Argos toolbars and changing your password. You can also access the integrated Help system or visit the Evisions web site that has many helpful resources available. The most common actions are replicated as buttons just beneath the menus.
At the very bottom of the screen, the status bar tells you what server you are logged in to, your username and user type.
Between the top and bottom toolbars is the Argos work area. The work area is broken into two halves. The left half contains the Navigation area while the right half contains the Action area.
Action Area
The right hand side of the screen will have buttons for any actions you can take on a selected object. The buttons that show will depend on the type of object you select in the Navigation area.
Navigation Area
This area contains the objects that you can perform actions on. There are three different views you can use for the Navigation area by clicking the desired tab (Explorer or Shortcuts). Each of these views is described below.
Explorer view
The Explorer is the default view for the Navigation area, in which a simple menu of available folders and objects is displayed. Argos objects that can be found in the Explorer include:
| Icon | Explorer Object | Description |
|---|---|---|
|
|
Folders | Contains objects, including other folders. |
|
|
DataBlocks | The “parent” object for one or more reports. |

|
Dashboards | Display-only reports for quick reference. |
|
|
System Created Dashboard | The dashboard that is automatically created by Argos for every new DataBlock. The system dashboard is always called "Dashboard" and cannot be renamed or deleted. |

|
User Created Dashboard | This dashboard is created by users. Dashboards can be used to view information quickly without having to run a report. |
|
|
CSV Report | A comma-separated values report. |
|
|
Crosstab Report | A report that compares two or more variables in table format. |
|
|
Banded Report | A fully-formatted report. |
|
|
Extract Report | A text report that meets pre-defined specifications. |
|
|
Delimited Extract Report | An extract report that uses a user defined delimiter (tab, commas, and spaces are common delimiters). |
|
|
Fixed Width Extract Report | An extract report the width of each field is defined by the user. |

|
XML Extract Report | An extract report whose output is an XML file. |

|
Private Report (Banded) | A report that only appears for the report creator and the administrator. The eye icon on top of the regular report icon indicates that it is a private report. |
|
|
Schedule | Reports may be scheduled to run automatically. |
|
|
Trash Bin | Contains items deleted from the Explorer Tree. |
Note: Report Viewers do not have privileges to add, modify, or delete objects within the Explorer tree.
Are my reports secure? You may be wondering about the security of reports in Argos. Each object can be assigned to groups or individuals as needed. Unauthorized users would not be able to see objects they lack permissions for. It is even possible to have security all the way down to individual fields in a CSV or Banded report.
Is my data secure? All data transmitted from the server to Argos is “point-to-point” encrypted, meaning that anyone other than the intended user would see only gibberish. Once a report is created, care should be taken with resulting file(s) to ensure data security.
Some objects can be flagged as private. Private objects will not show up in the Explorer for users other than the creator and the administrator. These objects will have the “private eye” icon like the sample private Banded report icon on the list above.
Within the Explorer tree, reports always reside beneath a DataBlock parent. A DataBlock can have many “child” reports. Any object that has child objects will have a “+” next to it. Simply click the “+” to expand the object to view its children.

Shortcuts View
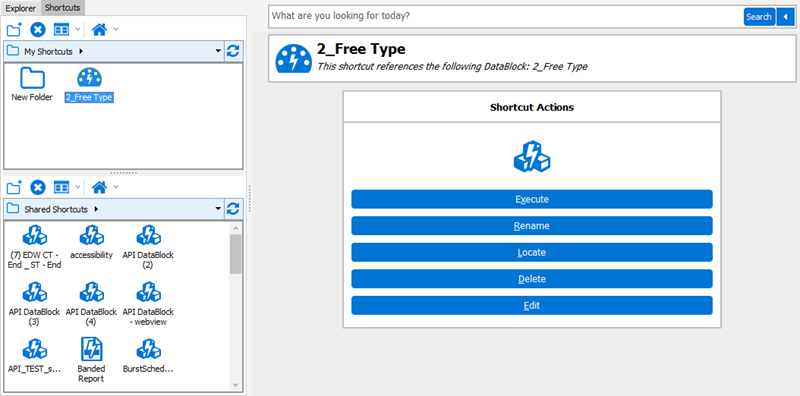
If you use a DataBlock or report frequently, you can right-click on it and choose “Add to Shortcuts”. Adding objects to the Shortcuts makes it easier to find what you need. Click on the Shortcuts tab to view shortcuts.
This view can be very convenient as it shows only your available shortcuts. You can even rename a shortcut to something other than the original name. To find the original object in the Explorer view, right-click a shortcut and choose “Locate” (see figure on the right). Deleting or renaming a shortcut has no effect on the original object.
