Creating Mailing Labels
Introduction
The Argos Band Editor can be used to generate labels for an extensive list of labels from many different manufactures. You can also create your own custom label size as well.
Select the Mailing Labels Report Type
To use the Band Editor to generate labels, begin the report creation using procedures outlined in previous examples. However, on the form where you select the Report type, choose the ‘Mailing Labels’ option.
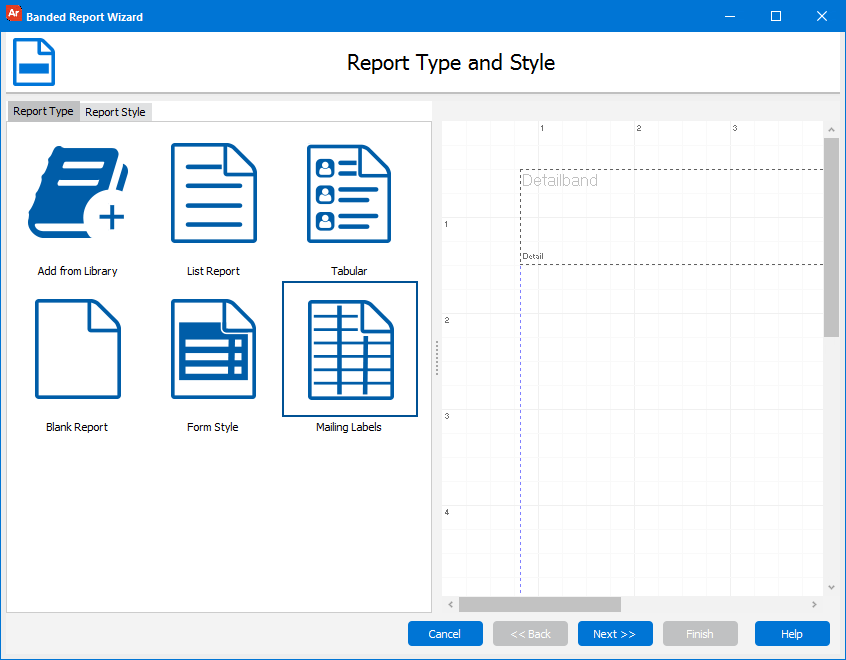
Click Finish to continue.
Select the Fields to Use
- On the next form, select the fields that you would like to appear on the label.
- This example will once again use the Employees table in the sample database.
- Select last_name, first_name, city, Street_Line1, Street_Line2, Street_Line3, State, and Zip.
- Click Next to continue.
- The next form allows you to choose the Label Format. Select the Mailing Label Options tab.
- Select the Vendor, and then the Format. For this example select the vendor Avery Standard, using the 2163 Mini layout. Click Finish to continue.
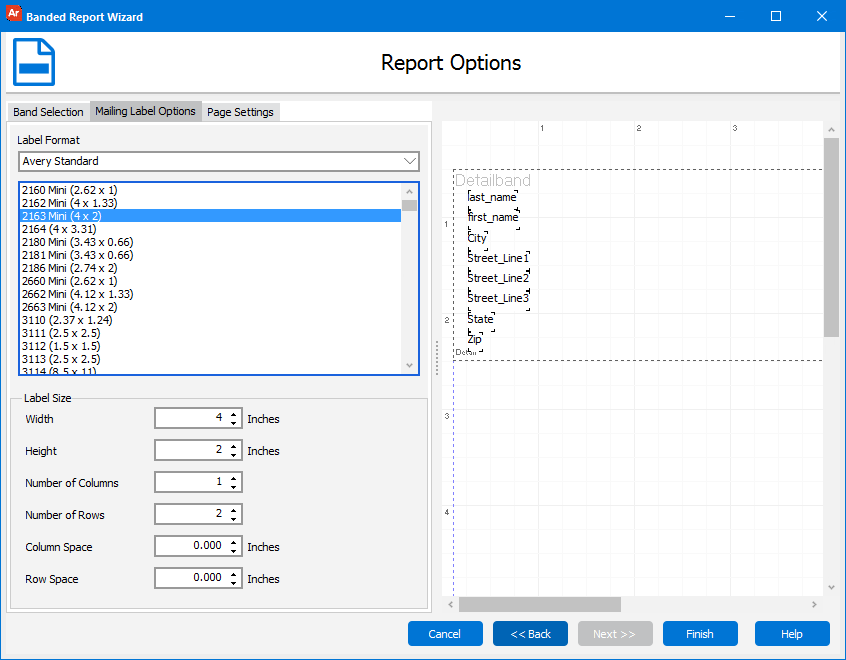
Note: If the label you are using is not listed, select one that is similar, as you can change the size and position of the individual labels later.
The figure above shows a sample layout. The Band Editor has already defined the margins for the selected label, but you can change these if needed.
Edit the Fields
The Band Report Editor is then displayed with the label existing within the Detail Band. You are now free to change the characteristics of the data (font size, font color, etc) within the Band.
- Right-click anywhere within the detail band.

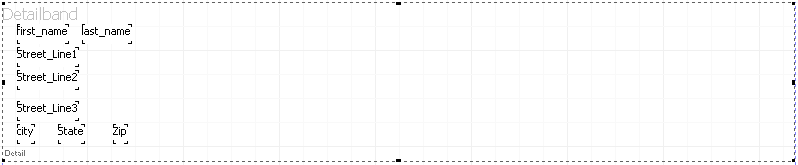
- Rearrange the fields to appear as follows on the label:
[first name] [last name]
[Street 1]
[Street 2]
[Street 3]
[City] [State] [Zip]- To move a field, select it, then click and drag to move it. Multiple fields can also be selected and properly aligned using the alignment tools.
- To make sure the all the fields are aligned on the same left margin, select the first_name, Street_Line1, Street_Line2, Street_Line3, and city fields and click the Left Alignment icon
 .
. - Align City, State, and Zip across the bottom using the Bottom Alignment tool. Position the fields as follows:
- Click the Preview button
 to preview the lalyout. Make sure to run with a good sample to ensure you test different possibilities. Any problems are quickly taken care of by using Rich Text Fields in conjunction with the Expression Builder. Return to the Report Editor to first take care of the formatting for all fields.
Using Expressions to Format Fields
For more control over your customized label, use the Rich Text Editor to add fields to the label using expressions. Expressions will be used to:
- Add fields that were removed
- Concatenate the first and last name
- Concatenate City, State, and Zip
Concatenating is done using the + sign. When joining fields with the plus sign, all leading and trailing blanks will be removed. This means that you need to add a space between the first and last name.
The new fields will be created using expressions created with the Rich Text Editor.
- Select your existing fields and delete them.
- Click the “Add a Rich Text Field” icon
 within the Band Report Editor Toolbar then click anywhere within the Detail Band. The Rich Text Editor will be displayed as shown below:
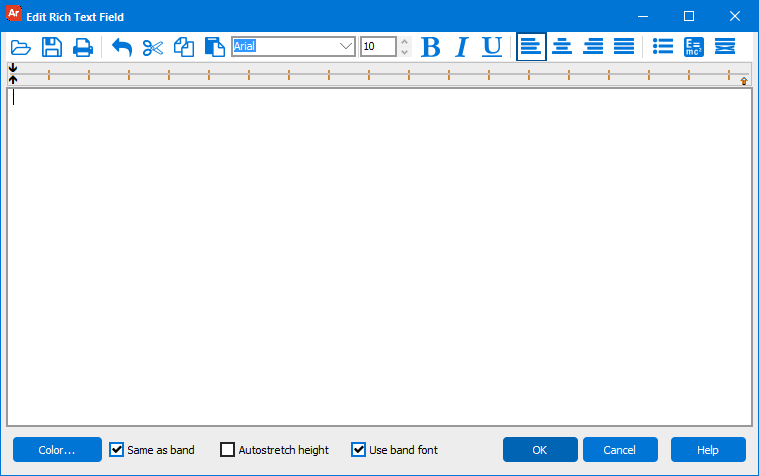
The Rich Text Editor can be thought of a mini text editor and provides various text formatting features. - To add database fields to the label, place the cursor in the appropriate location and click the
 button.
 - Select the desired field in the expression builder.
- Add each of the fields needed for the label. Use single quotes to create blank spaces between fields when necessary (such as the space between the first and last name). The rich text field should read:
%%ArgosData.last_name + '' + ArgosData.first_name%%
%%ArgosData.Street_Line1%%
%%ArgosData.Street_Line2%%
%%ArgosData.Street_Line3%%
%%ArgosData.City + '' + ArgosData.State + '' + ArgosData.Zip%%
Note: Expressions embedded in text in Argos are surrounded by %%. For example, the expression ArgosData.Street_Line1 would appear in the text editor as %%ArgosData.Street_Line1%%. If you use the expression editor to add expressions, the %% will be added automatically.
You can now enhance the appearance of the label by changing the font, font size and font characteristics (bold, italics, underline) by selecting the appropriate icon on the toolbar. Additional commonly used formatting features can be selected (left, center, right justify), adding bullets, and setting background color.
For this example the street addresses will be bolded and italicized, and will be changed to Times New Roman font.
Suppress Printing of Empty Lines
Fields Street_Line2 and Street_Line3 may not contain data. To avoid printing lines with no data, use the Remove Line if Empty icon  . This will remove lines that have no data, as would typically happen with a residential address where the first line is used, but subsequent lines are not used.
%%ArgosData.last_name + '' + ArgosData.first_name%%
%%ArgosData.Street_Line1%%
%DEL%ArgosData.Street_Line2%%
%DEL%ArgosData.Street_Line3%%
%%ArgosData.City + '' + ArgosData.State + '' + ArgosData.Zip%%
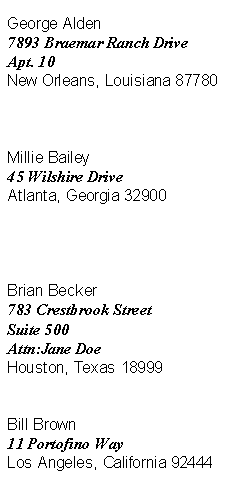
Street_Line2 and Street_Line3 now have DEL inserted, indicating that the line will be removed if it is empty.
Click OK to add the fields to the selected band.
Drag the resulting field to the upper left of the Detail Band and resize it to accommodate the fields. You may also need to resize the Detail Band.
Resizing fields: A field can be resized manually by selecting the field, then dragging the handles of the box that surrounds the field. Or, you can avoid manual resizing by selecting the “Autosize width” or “Autostretch height” selections that appear on the “Edit” dialog for a field.
The final output is shown below. Note that for each label, there are no blank spaces between any of the lines.