Editing the Report Design
There are a number of toolbar icons within the Editor that will be discussed further in the next example, but for this report a title will be added to the Page Header band by clicking the  icon (Text Field Object) on the toolbar then clicking anywhere within the Page Header band.
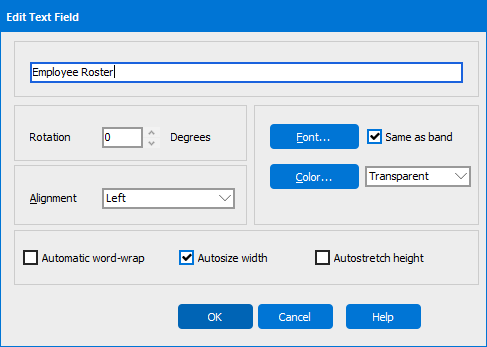
The Edit Text Field dialog box will appear in which you can create text for the band as well as change the font size, color, etc. You can also change the background color of the band. Enter “Employee Roster” into the textbox as shown below. Click the font button to change the font size to 18.
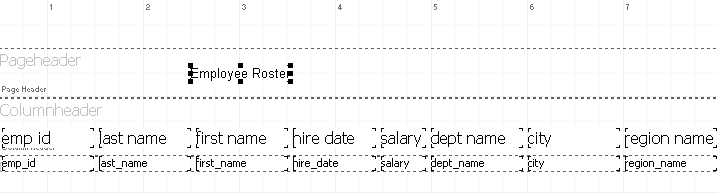
The title “Employee Roster” will now appear in the Page Header band. Note that the title is not centered, so click within the “Employee Roster” box and drag the field to the desired location. Alternatively you can highlight the field and click the “centering text” icons shown at the right.
Tip: To quickly center the text within the title bar horizontally or vertically click on the text, then click the “Align the selected control to the horizontal center of its parent” button
, or click “Align the selected control to the vertical center of its parent” button
.
You can also right click on the field which brings up a list of properties for the field that can be modified.
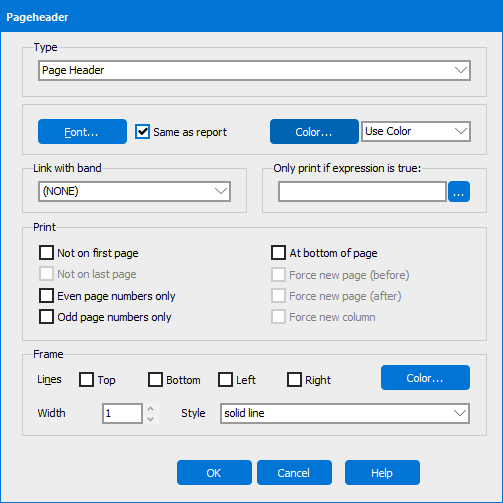
You can change the background color of the band by positioning the cursor anywhere within the band (but not on the field just created), right-click then select Edit. Click on the “Color” button to select a background color for the band. For this example, dark grey is selected. The report design now appears as follows:

Next the text for the labels in the Column Header will be changed. Right-click on each label, select edit, then type in the new name for the label. In this example, the text for each label will be capitalized.
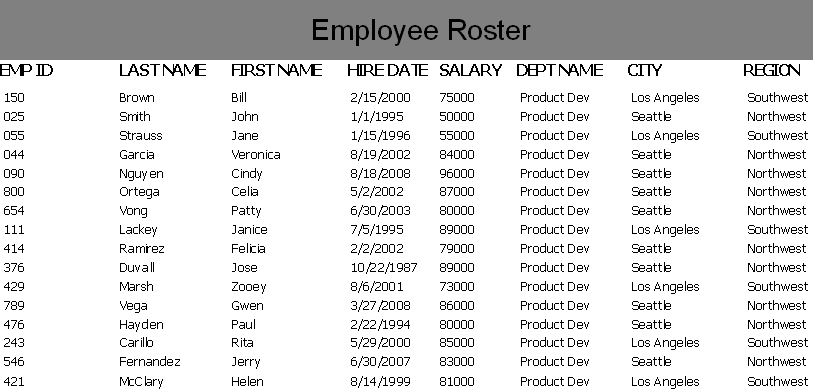
Click the Preview button  to view the report and it will look like this (larger font for “Employee Roster”) and all titles capitalized. Adjust font size and appearance to ensure readability.
When you are finished, click the Save button to save the report  . After you have saved your report, click the close button
  to close the editor.
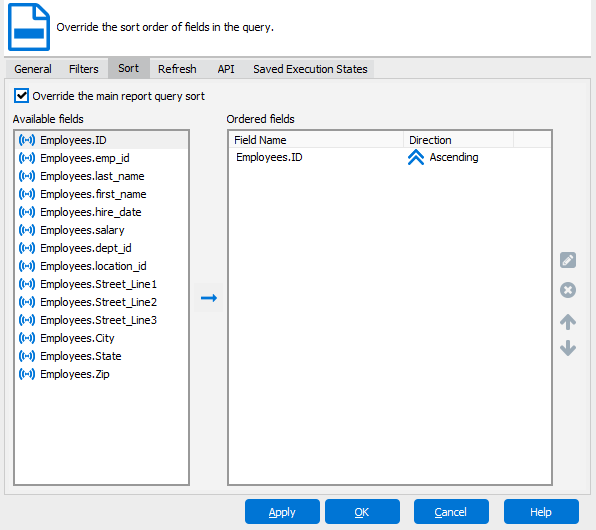
As a reminder, you can further edit or sort the report by returning to the Argos navigation pane, highlight the report, then click Edit Report. Click the Filters or Sort Tab to modify the report. For example, to sort the report by Employee ID, add the Employees.ID field, as shown in the figure below:
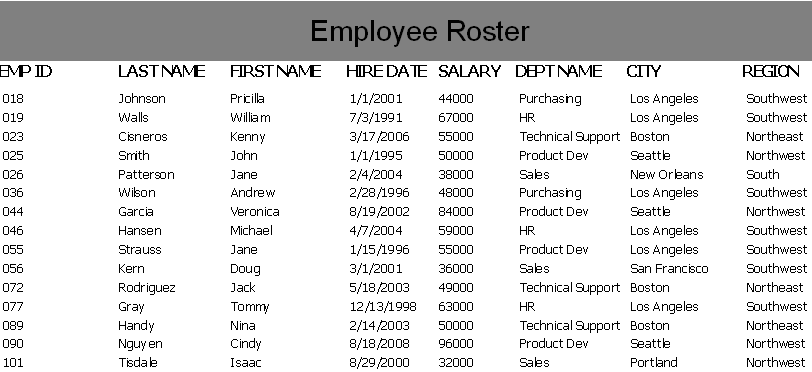
After executing the report again you can see the report is now sorted by Employee ID.
Your first simple Banded Report is now complete. The next step is to enhance the report to obtain the final report format.