Resizing and Aligning Fields
As fields are added to the report, you may need to resize them to ensure that the contents of the fields will fit into the space allocated by the editor. You will also want to align fields to each other horizontally and vertically to produce an attractive appearance.
Resizing Objects
Selecting an object (left mouse click) displays the boundary of the object with resizing handles. You can increase/decrease the size of the field by dragging the appropriate handle. You can also click on the field and drag it to another location.

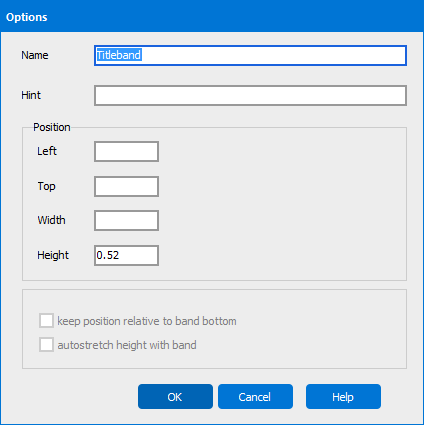
For additional resizing options, right-click on the field and select Edit. The Edit dialog box will appear shown in the figure below. Checking the Autosize width and Autostretch height check boxes will adjust the size of the field to fit the contents of the data, if necessary.

Resizing Bands
Aligning Fields
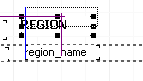
When repositioning a field by dragging it, Argos will display blue horizontal or vertical alignment guidelines to assist you in aligning a field with other fields. In the figure below, note the blue vertical alignment line (to the left of the “R” in REGION) that appears when moving the REGION title to align it with the region_name field.
There are also alignment icons within the Band Report Editor Toolbar (shown below) that can be used to align multiple fields to each other. The methods for selecting multiple objects are described below.

| Icon | Usage |
|---|---|

|
Align by left sides |

|
Align by horizontal centers |

|
Align by horizontal center of parent |

|
Stretch to be same horizontal size |

|
Align by right sides |

|
Align by top sides |

|
Align by vertical centers |

|
Stretch to be same vertical size |

|
Align by bottom sides |

|
Align by vertical center of parent |
Selecting and Aligning Multiple Fields
Multiple fields can be selected by depressing the shift key and clicking on the desired field(s). Each selected field will then be surrounded by a rectangle with small gray boxes on the corners. These fields can be moved or aligned as a group. In the figure below, all fields are surrounded by the small gray boxes, indicating that they are grouped together.

Multiple fields can also be selected by depressing the Ctrl key and dragging the cursor to create a rectangle around the fields that you want to include. All objects enclosed within the box will be individually surrounded by the small gray boxes described above and can be moved or aligned as a group. The rectangle shown in the figure below (created by dragging the cursor) shows seven fields that have been selected and will be treated as a group.

When using the alignment tools, select one object, then select additional objects to be aligned using either method described above. All objects will be aligned to the first object selected.