Shortcuts
Shortcuts are useful for users who run reports on a regular basis. Rather than navigating through the Explorer Tree to find the report you need to run, add it to the Shortcuts for easy access. It is very similar to creating a shortcut in Windows.
Shortcuts also provide a method to organize frequently used DataBlocks and Reports by separating them from the list of objects in the Explorer tree. They can be shared (Shared Shortcut) so all users can see them (based on security settings) or private (My Shortcut) so only the creator can see them. Click the Shortcuts tab to switch to the Shortcuts view.
To execute a shortcut, navigate to the Shortcuts tab and double-click it. Alternatively, select the shortcut and click the Execute button in the right pane of the interface.
To create a shortcut, select an object (the “target” object) in the Explorer tree, right-click and select “Add to Shortcut”. Alternatively, select the object and click the Shortcut button in the right pane. The following dialog box will be displayed.
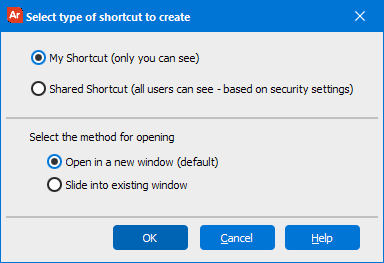
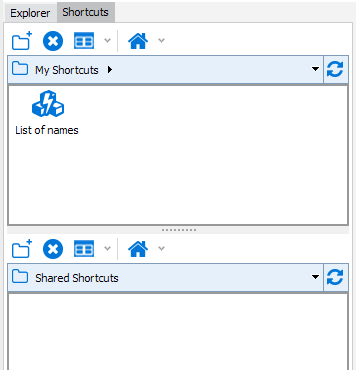
Select the desired option, click OK, then Argos will add a shortcut for this object into the Shortcuts tab beneath either “My Shortcut” or “Shared Shortcut” as shown below.
Note that you can specify if the report is to be run in a new window or slide into the existing window. Sliding a report into an existing window keeps the Explorer Tree visible and displays the report in the pane at the right.
Within either My Shortcuts or Shared Shortcuts, a folder structure can be created to help organize the shortcuts. The icons in the table below are used to manage the shortcuts.
| Icon | Description |
|---|---|
|
|
Create New Folder |
|
|
Delete the currently selected object |
|
|
View large icon, view small icon, List view. Clicking the down-arrow allows you to select large or small icons, or to change to a list view of the objects. |
|
|
Go to the user’s defined home location (folder or shortcut) |
Creating a Folder Structure
Newly added shortcuts are always added to the root of the folder structure.
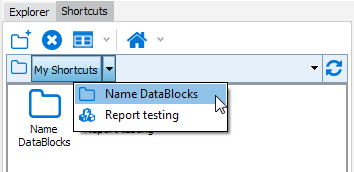
To navigate to the root of the folder structure, click “My Shortcuts” (see figure below). To add folders beneath the root, merely click the Create New Folder icon. A folder will then be created with a default name that you may override.
To create a folder beneath an existing folder, double-click the folder then click the “Create New Folder” icon. The newly added folder will then be placed beneath the selected folder. Alternatively, you can add a folder (with nothing selected), which adds a folder to the root. You can then drag the newly added folder into the target folder.
The folder hierarchy is represented in breadcrumb style as shown below.
Breadcrumb
- The breadcrumb displays the folder hierarchy for the current open folder.
- Clicking on the folder name within the breadcrumb takes you to that folder.
- Clicking the right pointing arrow to each folder in the breadcrumb displays the contents of that folder. The sort order is based on the currently sort option (name or type).
- Selecting an object from the drop down list will navigate to that object (folder or shortcut).
- At the right of the breadcrumb is a refresh button which refreshes/rebuilds the entire folder structure for both My Shortcuts and Shared Shortcuts.
General Notes
- Folder names cannot contain a period.
- Folders can contain both shortcuts and other folders.
- Empty folders will be deleted when the user logs out from Argos.
- Folders are listed in alphabetic order.
- The default sort order is by name.
- Sort options work independently for My Shortcuts and Shared Shortcuts.
Context Menu
A right-click on any shortcut object displays the following context menu options:
| Menu Item | Description |
|---|---|
| New folder | Adds a new folder to the current location. |
| Sort by | Sort by name or object type. |
| Cut | Cut the currently selected object to the clipboard. |
| Paste | Paste the object on the clipboard to the current location/folder. |
| Execute | Execute the currently selected shortcut. |
| Locate | Find the object the selected shortcut references, switch to the Explorer tab, and select that object. |
| Edit | Modify the shortcut properties specifying whether it is a shared or private shortcut, and where the shortcut opens. |
| Delete | Delete the selected object. |
| Rename | Rename the selected object. |
| Set as Home | Set the user’s home location to the selected object or location. |
Moving/Reorganizing Shortcut Objects and Folders
- Moving a folder moves all of its contents as well.
- Folders can be moved into other folders.
- You cannot drag and drop items into the breadcrumb.
- You cannot drag objects between My Shortcuts and Shared Shortcuts (use the Edit Shortcut option to change this).
- Cut and paste will work anywhere within My Shortcuts and Shared Shortcuts but not across My Shortcuts and Shared Shortcuts
- Ctrl-X and Ctrl-V can be used to cut and paste.
- Multi-select is not available for shortcuts since the pane on the right displays information and action buttons for a single shortcut.
Deleting an Object Referenced By a Shortcut
If you attempt to delete an object (DataBlock or Report) in the Explorer tree, and the object is referenced by a shortcut, the following warning will be displayed stating that the object to be deleted is referenced by a shortcut.
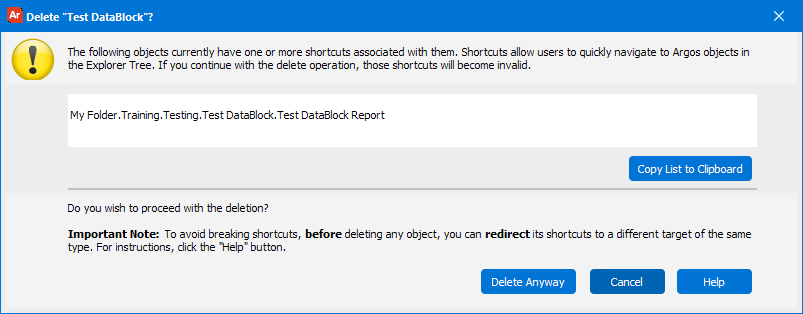
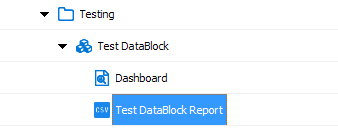
In this example a shortcut exists for the csv report shown in the figure below, and an attempt to delete the report from the Explorer tree causes the warning to be displayed.
The reminder further states that you may want to redirect the shortcut to a different target prior to deleting the object in the Explorer tree. If you do not redirect the shortcut, the link from the shortcut to the object in the Explorer tree will be broken.
If you choose to not redirect the shortcut and accept the broken link, select “Delete Anyway” to delete the object from the Explorer tree. A red “X” will be placed next to the shortcut indicating that its target no longer exists, as shown below.
Also note in the right pane that the date, time, and user who deleted the object in the Explorer tree are identified.

An attempt to execute this shortcut will display an error explaining that the target of the shortcut cannot be located.
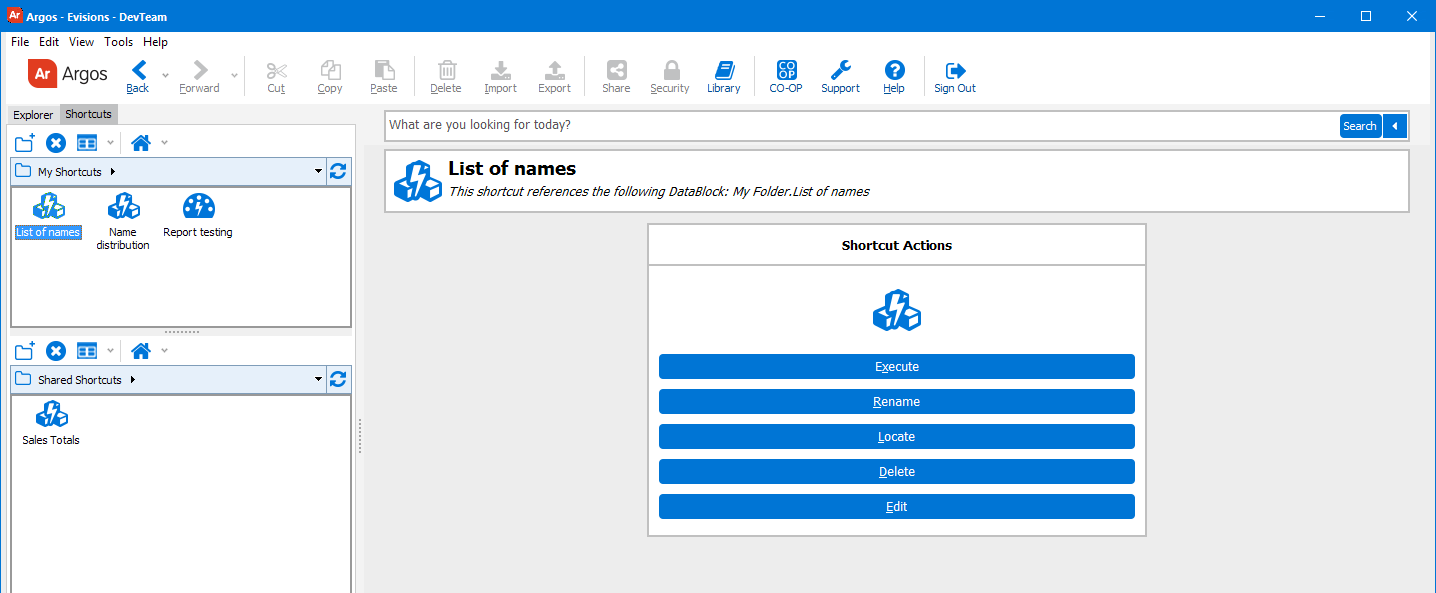
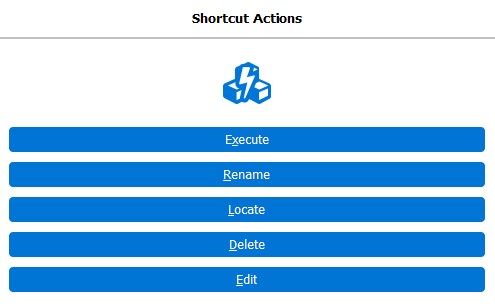
Shortcut Operations
Selecting a shortcut displays the following options in the right pane of the Argos interface. These options allow you to execute the target of the shortcut, rename the shortcut, or locate the target of the shortcut in the Explorer tree.
For information about applying security to shortcuts, see Shortcuts and Security.
For information about applying security in general, see Manage Security.
To learn more about shortcuts see the Argos Support Resources page.