Check Register Reports
After selecting the Check Register report from the list, click the Next >> button to continue. A list of batches for the selected account code will be displayed.
If desired, filter the list of batches using the optional Start and End Date fields.
Select the desired output from either Comma Delimited (.csv) or Formatted (.pdf) report types.

Then, select the desired batch(es) from the list.
You may change the default sort order for the checks in the report by selecting available fields as shown in the figure below. First click the Override the default order by for the report check box. To include a field in the ordering, select the field from the Available Fields pane, then click the right arrow. The field will then be moved into the Ordered Fields pane and will be included in the ordering. Clicking Ascending toggles the Direction to Descending. Fields are sorted by the order of fields in the list. You can move fields up or down in the list by clicking the up and down arrows at the right. Fields are removed from the Ordered Fields pane by clicking the red X at the right of the pane.

Select the batch(es), the Order by Options (if desired), then click Preview to view the report. Order by Options is available for all report types.

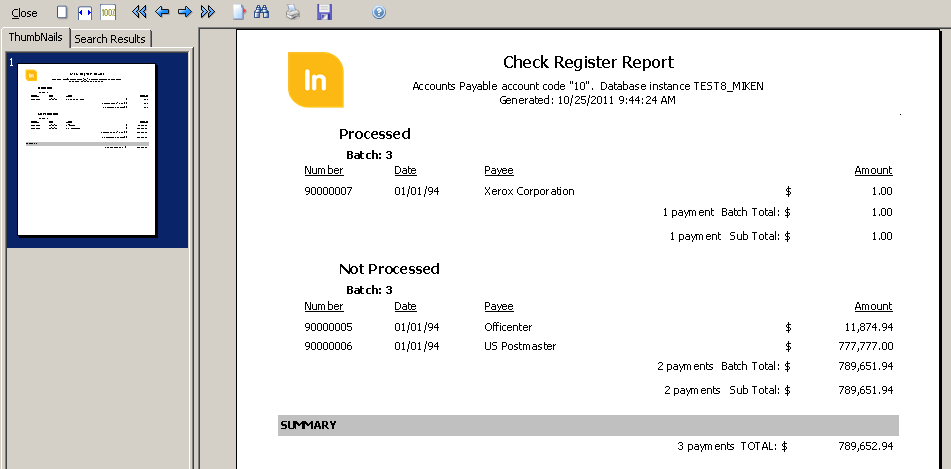
Scroll through the thumbnails on the left or use the Binocular icon to search for a specific piece of information. The report can be printed by clicking the printer icon at the top of the page.
The reports from IntelleCheck are built into the software to make information readily accessible. These reports cannot be modified. The payment data is stored in the IntelleCheck tables in the database. If customizations are necessary, you can create reports with a reporting tool.
Example reports have been created in Evisions’ reporting solution, Argos, and they are available in the Evisions CO-OP and from the IntelleCheck support page. Once these reports are added to Argos, the reports can be modified to meet any specific needs.