Configure Data Connections
You will need to create a new data connection specifically for IntelleCheck for each Oracle instance that you will be using with IntelleCheck (you may already have a data connection for a given Oracle instance if you have previously configured it for another product).
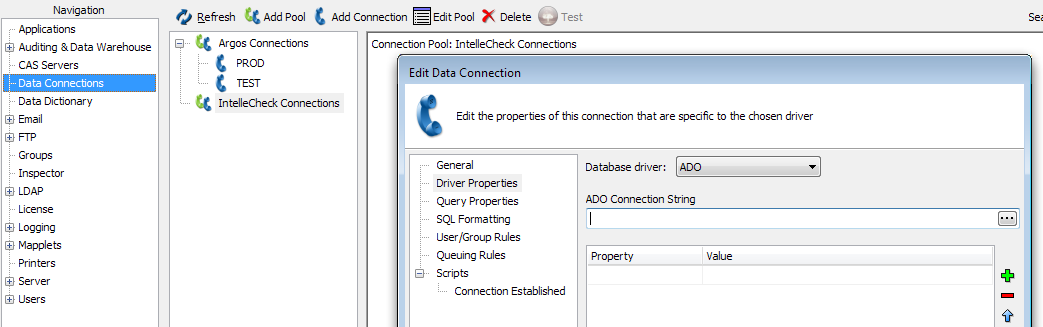
Go to the Data Connections screen. After selecting the appropriate connection pool (if any), click Add Connection.
Enter a name for this connection (we recommend using the database name), then go to the Driver Properties tab. Here, you can choose whether to use an ADO connection or a native Oracle connection, depending on the database provider you are using.
To create an ADO connection, select “ADO” in the drop-down and then click on the ellipsis (…) to build the ADO connection string.
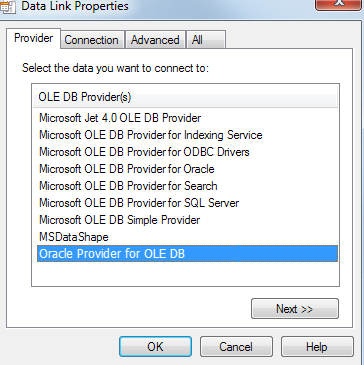
In the Data Link Properties dialog that opens, on the Provider tab, select the Oracle Provider for OLEDB.
On the Connection tab, enter the data source name, and the login information for the evisions Oracle user (database user). If you will be using the connection username and password, check the box to allow saving password. You can then use the Test Connection button to verify that the data source configuration is correct.
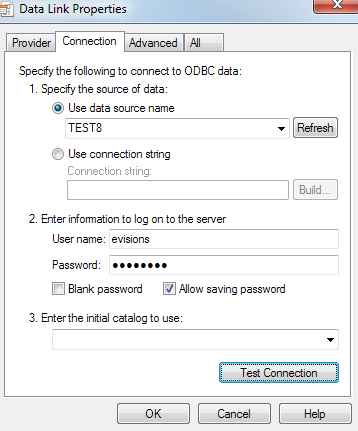
Click OK to return to the Edit Data Connection dialog.
If you want to use a native Oracle connection, you would simply select Oracle in the database driver drop-down, and then enter the desired properties. Native connections may be faster than ADO connections for certain types of queries.
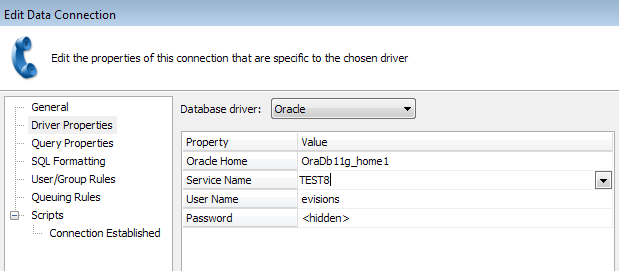
- If you have more than one Oracle Home, you may wish to specify which one to use, or leave it set to <use default>.
- The Service Name is the name of your database. This drop-down list is populated based on the databases in your tnsnames.ora file.
- As with ADO connections, you can choose to specify a connection username and password here, or use the credentials defined on the User/Group rules screen (described on the next page) for specific individuals or groups.
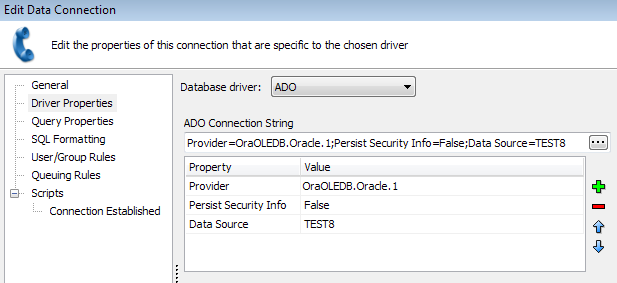
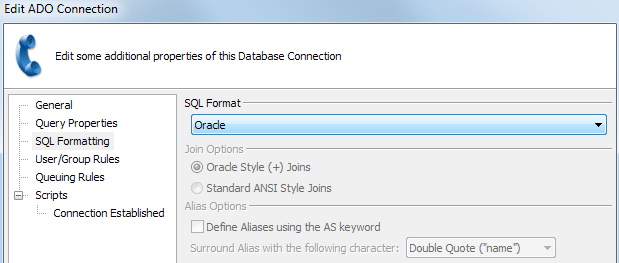
Regardless of which Oracle driver you are using, next you will go to the SQL Formatting screen and select the appropriate SQL format for your database. In this case, we are selecting Oracle.
Next, go to the User/Group Rules screen.
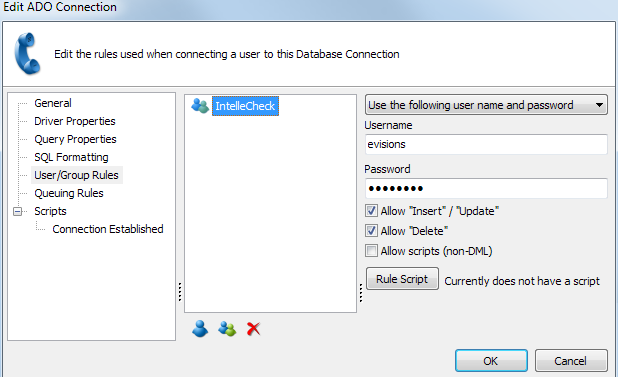
Select the “Everyone” group and click the  button to remove this group from the connection, since we do not want all users to be able to connect to IntelleCheck. Alternatively, leave the “Everyone” group but change the dropdown for this group to “Not allowed to connect”.
Use the Add Group  button to select the IntelleCheck group that you just created. If you checked the option to remember the password, you can select “Use connection username and password”. Otherwise, select “Use the following username and password” and enter the database login credentials for the Oracle evisions user below.
Check the boxes to allow insert/update and delete operations to be performed using this connection. You will have the option within IntelleCheck to control which users have permission to perform various functions, but the connection itself must be allowed to perform these operations.
For more information on data connection configuration, refer to the MAPS Help.