Printers
In order to print from the MAPS applications, the printer(s) to be used must be added to MAPS and then authorized for use with specific applications by specific users and/or groups. For example, if you have FormFusion installed for printing letters, you would add the appropriate printers, but limit access to these printers to only the FormFusion application.
Adding a Printer
To add a printer, go to Printers in the Navigation pane, then select Add Printer to open the Add Printer dialog.
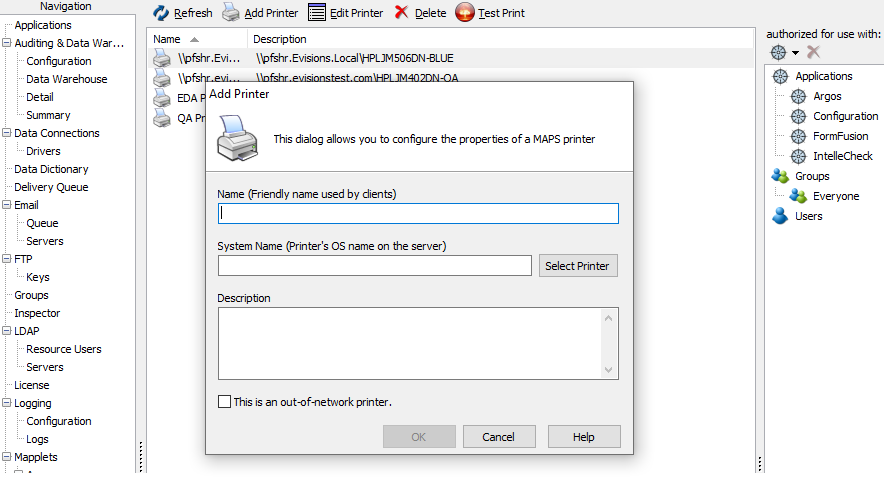
- Name (Friendly name used by clients) - The name given to a MAPS printer. This field cannot be empty.
- System Name (Printer's OS name on the server) - The name of the printer as it appears to the operating system. For local MAPS printers, you cannot change the System Name after it's been selected from Print Setup.
- Description - The user-provided description of a printer. Example: the printer's location or department.
- Select Printer - Opens the Print Setup dialog with the list of printers available to MAPS.
- This is an out-of-network printer - When checked, indicates this is an out-of-network printer to be used for cloud-based instances of MAPS.
The Select Printer button will open the Print Setup dialog, where you'll find a list of all printers installed on the machine.
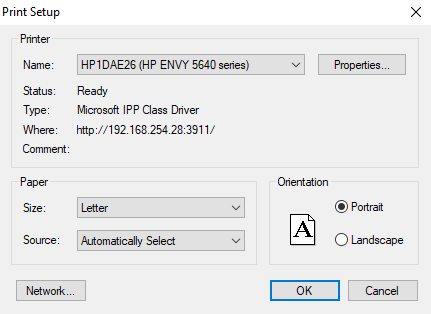
Select the appropriate printer from the dropdown, then click OK.
Notes:
- You must add printers from the MAPS server itself, or from a Remote Desktop connection to the server.
- You should log in to the server where MAPS is installed as the user the MAPS service is running as, and this user must have permissions to use the printers you wish to add.
- The printer driver must be installed on your server or installed as a network printer and accessible to MAPS for it to appear in the Print Setup dialog.
- At least one printer must be authorized for each MAPS application.
- MAPS requires a printer to be added to the server if one doesn’t already exist. It can be a dummy printer if no physical printers are connected to the server.
In either case at least one printer must be added to the server.
The printers that appear in the dialog are those that are available to the local system. In order for your printers to work correctly, you MUST add printers from the machine where MAPS is installed, or via a Remote Desktop session to this machine.
Adding an Out-of-Network Printer
For cloud-based instances of MAPS an out-of-network printer will need to be configured in order to print from MAPS applications. From the Edit Printer dialog, manually enter the system name of the printer being added.
- The name being manually entered in the System Name field must match the printer's system name exactly as displayed on the cloud-based delivery device.
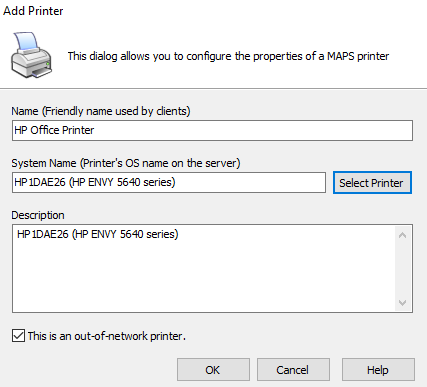
Lastly, ensure that the This is an out-of-network printer check box is checked, and select OK.
Authorization
You can now authorize the printer for use by individual applications, users, and groups. Right-click in the Authorized for use with pane on the right (or use the dropdown menu) and choose Add Application, Add Group, or Add User. These options open a list of available users, groups, or applications that can be authorized for use with the selected printer.
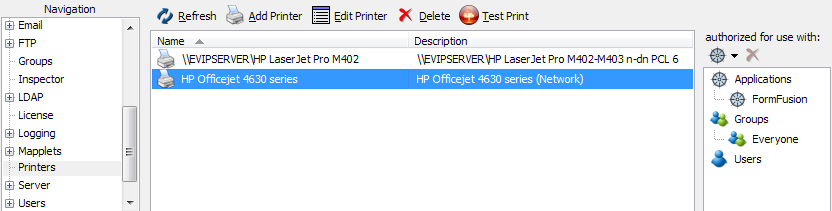
In this example, use of the HP Officejet 4630 printer is limited to the FormFusion application, and is available to all users (the “Everyone” group) who use FormFusion. To restrict access to specific users or groups, authorize those users or groups individually instead of using the “Everyone” group.
To verify that the printer was added to MAPS successfully, select the printer and then click the Test Print button at the top of the screen to send a test page to the printer.
If you run into any problems adding your printers, refer to the Troubleshooting section of the MAPS Help.