Example of Creating a REST Connector for Ellucian Ethos and Insight
The REST Connector is a module that allows you to create a data connection to a wide variety of existing RESTful APIs. REST Data connections can be configured with multiple API endpoints, each of which functions similarly to relational database tables that can be queried by Argos and other MAPS applications.
Driver Properties
Navigate to the Add Data Connection screen to begin configuring your REST Connector for your Ellucian data integration platform (Ethos or Insight).
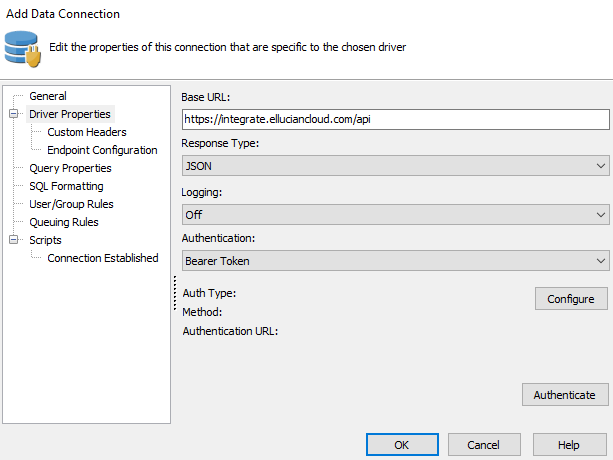
From the Add Data Connection Screen, navigate to Driver Properties, and enter your Base URL, and then input your Response Type, Logging if desired, and Authentication from the drop-down lists. Ellucian Ethos/Insight API returns data in the JSON format, so for this example select JSON as your Response Type.
For Authentication, select Bearer Token, as Ellucian data integration platforms will only provide access to its resources through Bearer Token authentication. When you have all the necessary information in your fields, select the Configure button.
Bearer Token Authentication

From the Bearer Token Authentication screen, select POST as your Method from the drop-down list. Then, type in your Authorization URL for Ellucian Ethos/Insight, and select Bearer Token as your Authentication Type from the drop-down list. Ellucian platforms use a two-step Bearer Token method of authenticating.
Next, select the ellipsis to open the Token dialog.
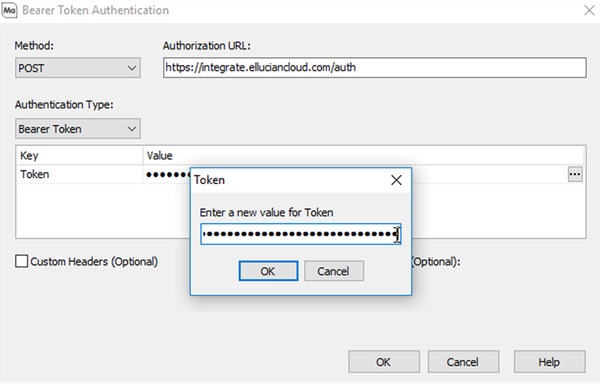
Here you will input your API key. If you have not been provided an API key, please open a ticket with Ellucian. Select OK to close the Token dialog, and select OK once more from the Bearer Token Authentication screen to continue.
Edit Data Connection
From the Edit Data Connections screen, navigate to Custom Headers tab.
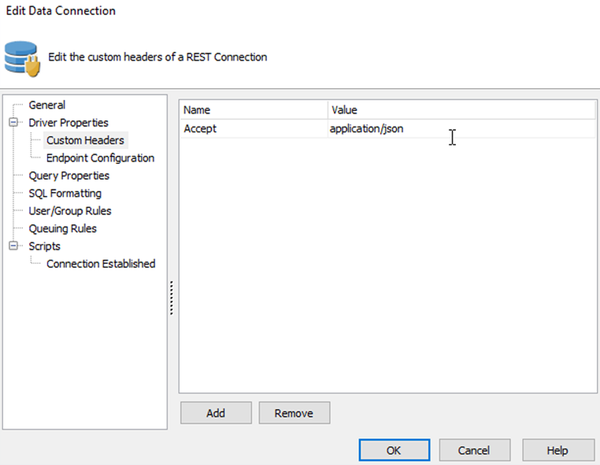
Enter Accept into the Name field, and application/json for the Value field. This field will ensure that the data will be returned in a JSON format.
Note: If you'd like to use a previous version of the APIs, please refer to your API documentation.
Next, navigate to the Endpoint Configuration tab.
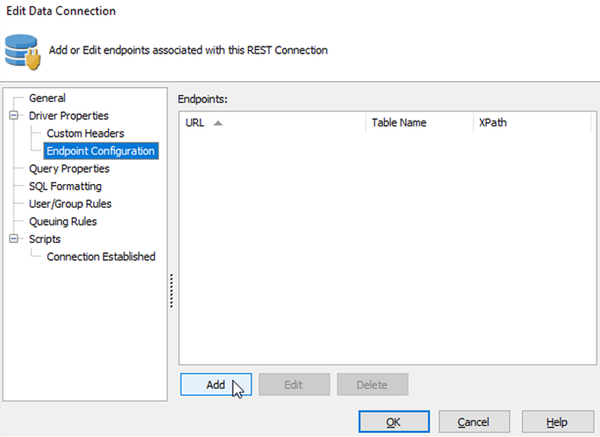
Select Add.
Edit REST Endpoint
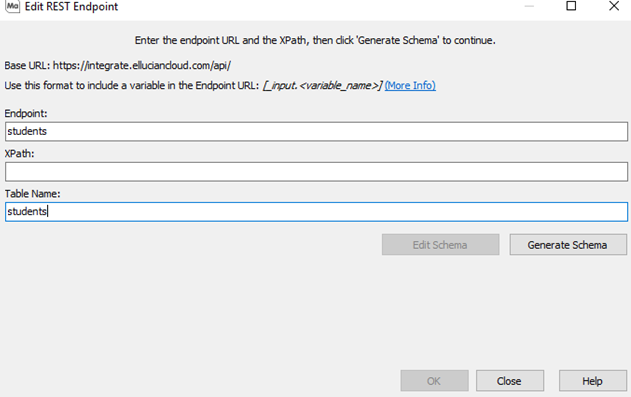
In the Endpoint field, type the name of your endpoint. For this example we are using the students endpoint.
Next, specify your Table Name. It is recommended that your Table Name be similar to the name of your endpoint.
When you're finished, select Generate Schema.
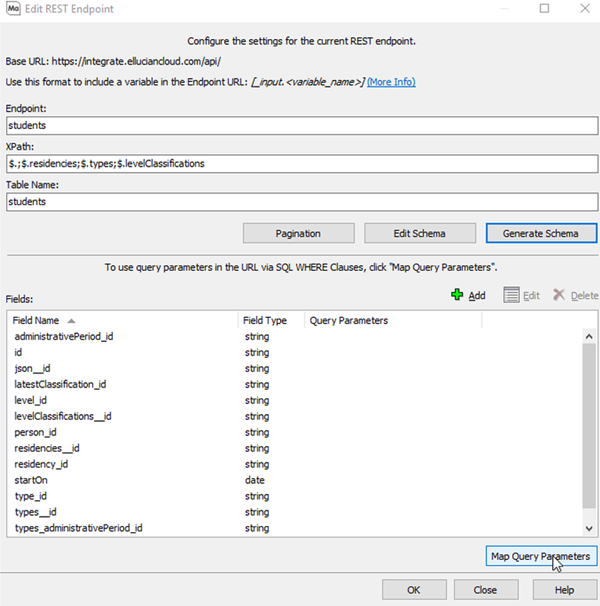
From here you can select OK to complete your connection, or you can select Map Query Parameters to filter your data from Ellucian Ethos/Insight by using the APIs.
Set Advanced APIs Filters
Advanced API filters can be used to narrow down your data set from Ellucian Ethos/Insight. Filters used in MAPS queries may not provide Ellucian Ethos/Insight APIs with the proper information it needs to filter the data. Specifically, your queries may run longer than anticipated, or you may come across errors when the data set you are trying to return is too large. Because of this, we strongly recommend that you configure advanced API filters for any specific data that you may need.
From the Map Query Parameters screen, select the Set Advanced Filters radio button.
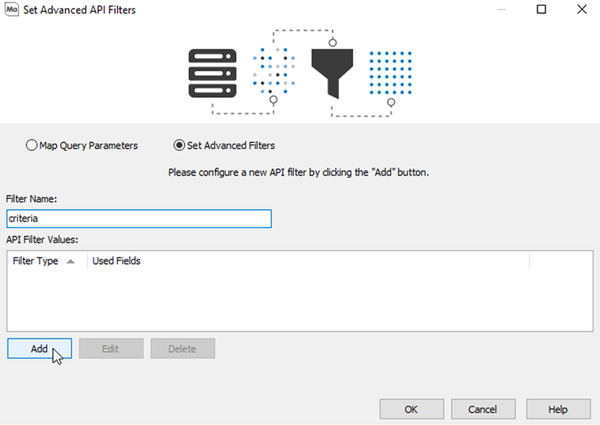
For Filter Name, enter the name of the parameter for your advanced filter. For our students example we are using Criteria. When finished, select Add to add a new API filter via the Edit Advanced API Filters screen.
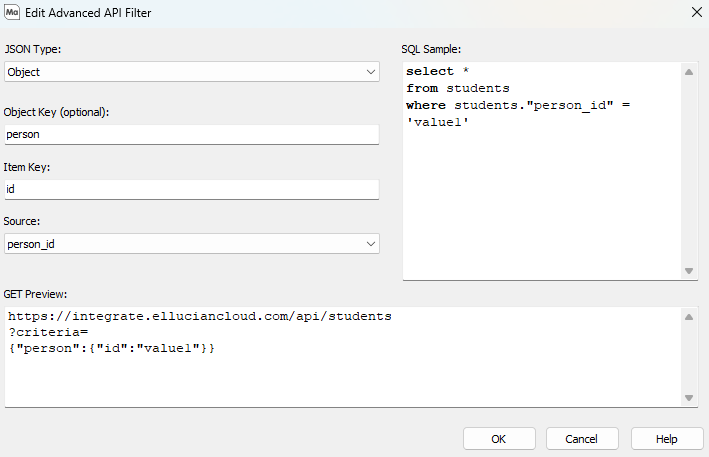
For this example, we are setting up the person_id filter for the students endpoint. This will allow us to filter the data from the students endpoint by searching for a student by their person_id.
For JSON Type, select between Array or Object. We chose Object for this example because the person_id filter is formatted as a JSON object.
Input your Object Key and Item Key for the advanced filter in the corresponding fields. If the Object Key is left blank it will be populated by the Ellucian Ethos/Insight format.
In the Source drop-down list, select the schema field that you'd like to use as your source.
When finished, select OK.
You'll now see your JSON Type and schema fields under API Filter Value.
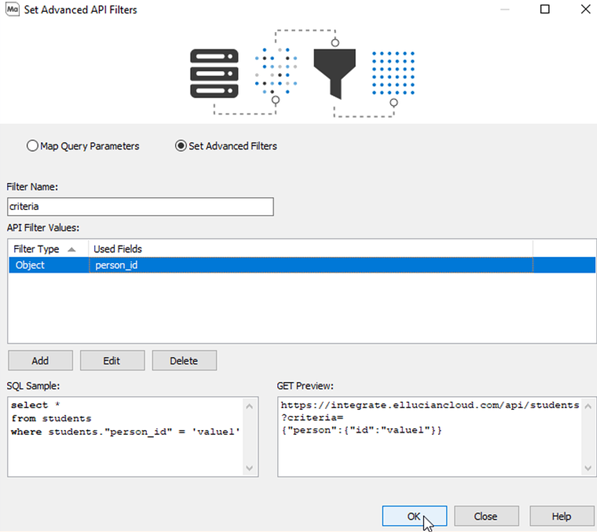
Select OK to save your filter to be used with future SQL queries.