Historical Process Workflow
This section provides an example of how you would create a historical entity. A historical entity takes data from a data source that contains legacy data, often a CSV file exported from a "live" system in the past.
In this example, we will create a Person entity based on data from a CSV archive created in 2017. This Person entity will be tagged with the Financial Aid tag for the end of the year, and it can ultimately be used in a number of surveys including those for Admissions, Completions, Graduation Rates, Outcome Measures and Student Financial Aid.
For a list of tags and the surveys that they are associated with, see Using Tags.
Workflow
The following workflow assumes that you are already familiar with configuration of entities. If not, review Typical Process Workflow before you begin.
Create a Data Source for the Legacy Data
This example assumes that you have your legacy data in one or more CSV files.
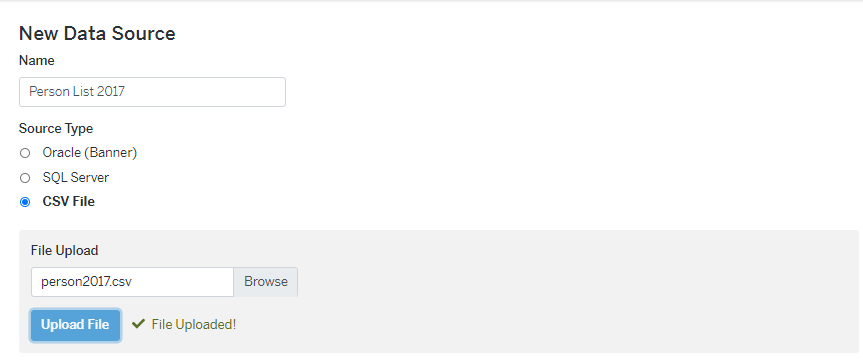
- Navigate to the Data Sources page and select the Add New button.
- Enter a name for your new data source. This name will display in the list of available data sources.
- Select the type of data file that will be used. For a historical entity, you will often use a CSV file.
- Upload the file that contains your data.
Select an Entity to Manage
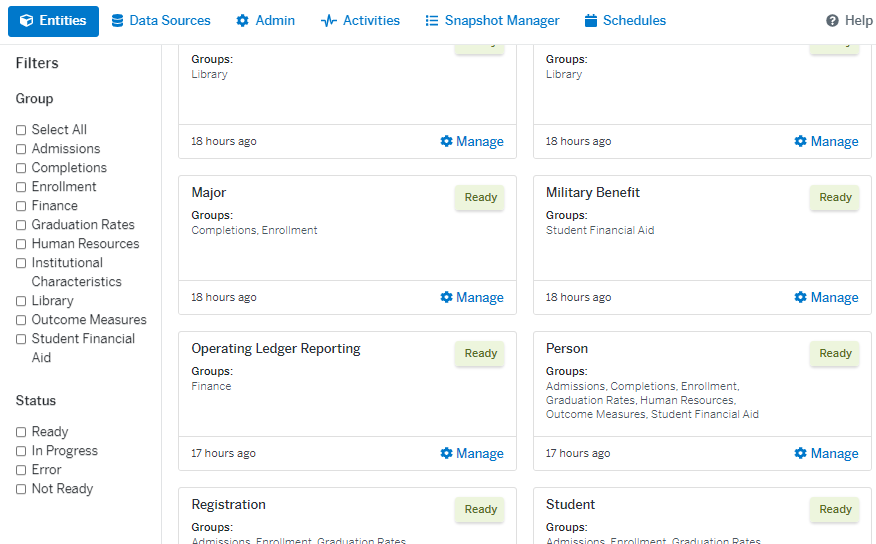
For this example, we will create a historical entity for the Person entity. The Person entity is used in many different reports and surveys, including those for Admissions, Completions, Graduation Rates, Outcome Measures and Student Financial Aid.
- Scroll down to the Person entity.
- Select the Manage link to edit the Person entity.
Select the Data Source, Date, and Tags
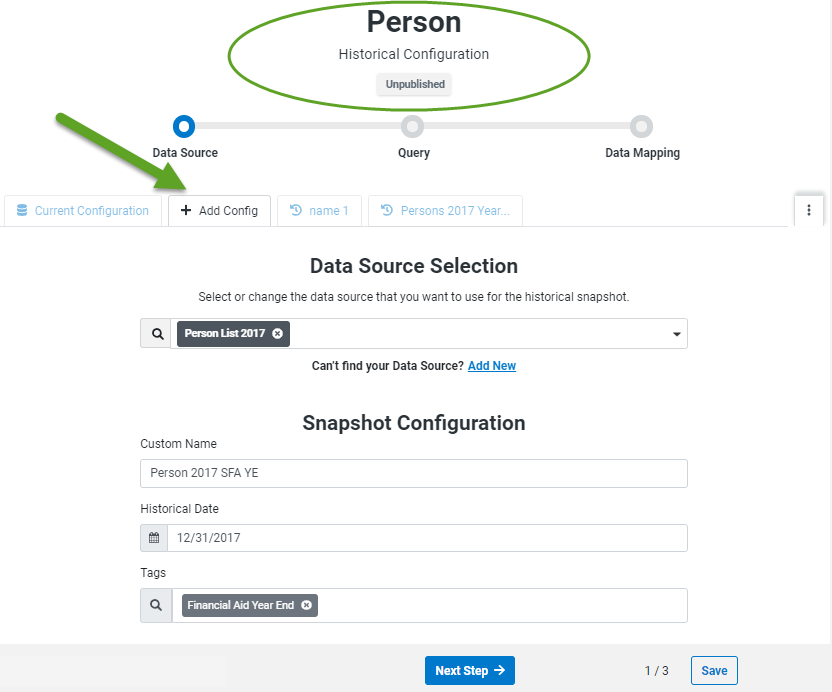
- From the configuration page, select the Add Config tab to create a new historical entity.
- Select a data source.
- Enter a name for the entity.
- Enter a date for the information.
- This should be the day that the data was collected.
- Select the tags you want to associate with the entity. For this example, use the Financial Aid Year End tag.
- Select Next Step when you are done.
Enter and Test the Query
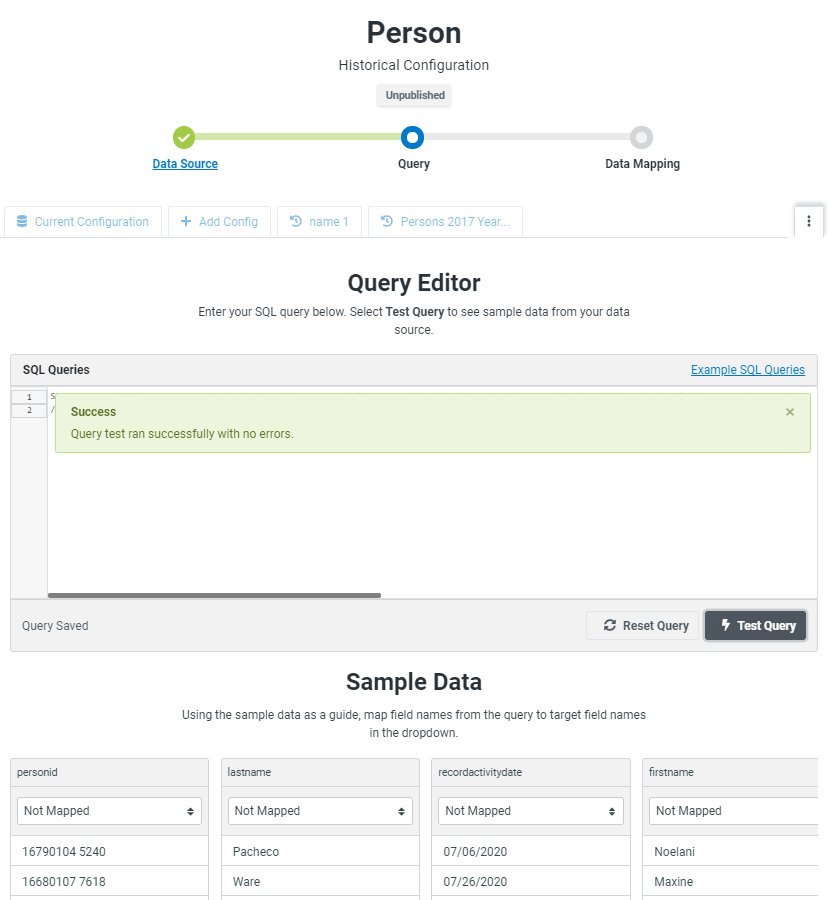
Next, enter and test your query to obtain a sample of the data from the data source.
- Type (or paste) your query into the query editor. In many cases, an Evisions representative will provide queries for you.
- When you use a CSV file as the data source, DORIS will pre-populate the query editor field with a simple query based on the columns in the file.
- Select the Test Query button.
- If the query is valid, sample data from the data source displays in the columns below the editor. The header for each list includes the name of the data source field.
- Open the drop-down for a column to display the available target field names. Select the one that corresponds to the data source field name from the query.
- Do this for each of the columns unless you are sure that you will not need the data in the data source column for your published entity.
- Use the scroll bar below the columns to display additional columns to the right. If you don't map one of the target fields that has a set of specific values associated with it, you will be reminded in the next step.
- Instead of using the drop-down list, you can start typing the column name in the field, then select it from the short list of matching names.
- Once you map a target field name to a source field, it is no longer available to be used for other data source fields.
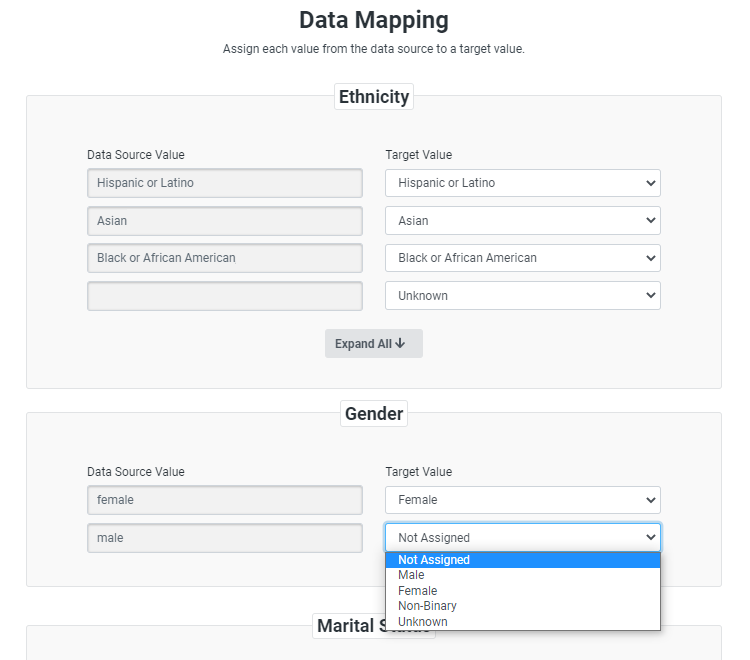
Map the Source Values to the Assigned Target Values
In some cases, the values extracted from the data source for a data source field do not match the values allowed for the entity. When this happens, you must manually assign each source value to a target value.
- For each value in the left column select the value in the right column to assign it to.
- In some cases, you may have more than one source value to assign to a target value. Be sure to expand the list to make sure you assign all of the source values.
- In some cases, you may have more than one source value to assign to a target value. Be sure to expand the list to make sure you assign all of the source values.
- When you are finished making assignments, select Save Changes.
- The entity configuration page displays again, this time with the Publish Entity button enabled.
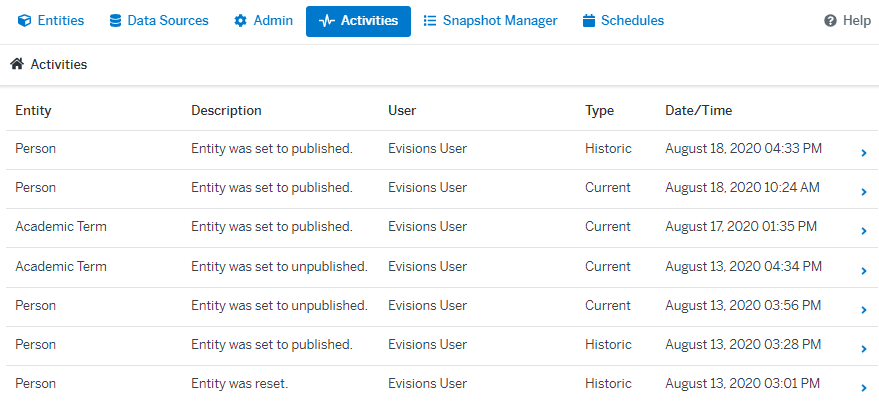
Publish the Entity and Make the Data Available
When your data mapping is complete, select Publish from the footer and confirm that you are ready to publish. The Activity page displays showing the recent activity for the entity.
Once published, the data for that entity can be ingested, and when ingestion completes, the data is ready to be accessed by another system such as IRIS.
Select Sync Historical data from the bottom of the main configuration screen to ingest the entity. Note that this will only sync that entity.
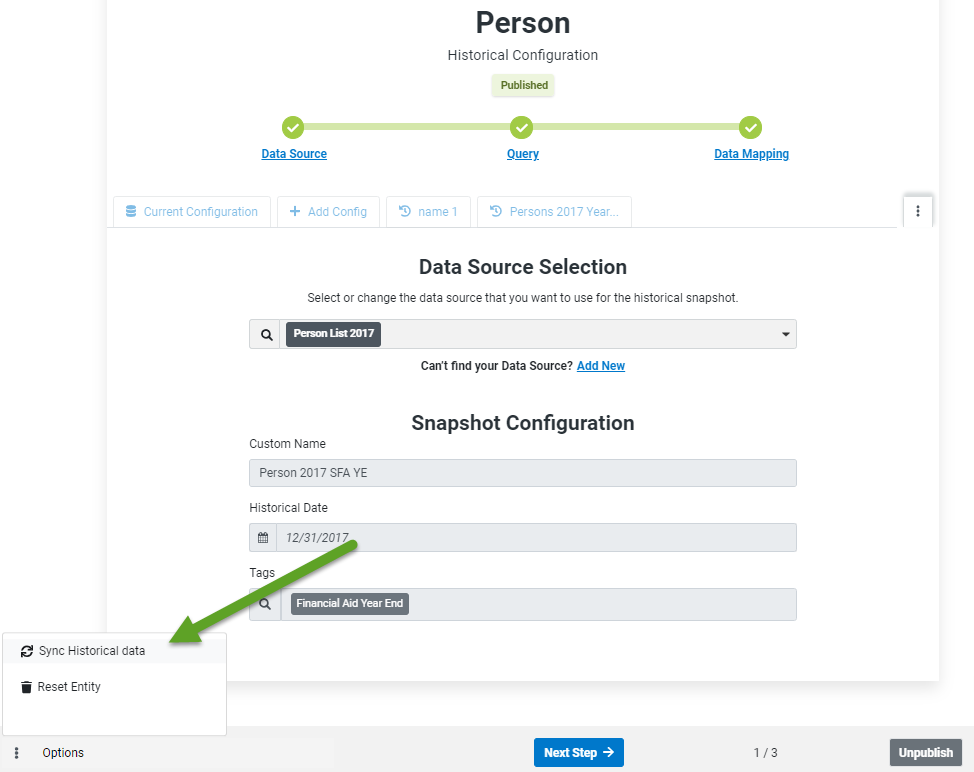
Reviewing a Historical Entity
If you want to review an existing historical entity, select the corresponding tab from the banner at the top. If you have many historical configurations, you may also want to use the tab at the far right, which displays a searchable list. The information displayed for the entity indicates that this is a historical configuration.
See also:
- Working with Data Sources
- Mapping Source Values to Target Values
- Publishing an Entity
- Ingesting the Data
- Publishing to IRIS